Salesforce target
Sends events to Salesforce.
With tmctl:
tmctl create target salesforce --auth.clientID <clientID> --auth.server <server> --auth.user <user> --auth.certKey <certkey>
On Kubernetes:
Secret
apiVersion: v1
kind: Secret
metadata:
  name: salesforce
type: Opaque
stringData:
  certKey: |-
    -----BEGIN PRIVATE KEY-----
    ...certificate...contents...
    -----END PRIVATE KEY-----
Target
apiVersion: targets.triggermesh.io/v1alpha1
kind: SalesforceTarget
metadata:
  name: salesforce
spec:
  auth:
    clientID: my.salesforce.client.id
    server: https://login.salesforce.com
    user: woodford@triggermesh.com
    certKey:
      secretKeyRef:
        name: salesforce
        key: certKey
  apiVersion: v50.0
  eventOptions:
    payloadPolicy: always
- Client ID: The client ID as retrieved from the Salesforce connected app.
- Server: The server used for Salesforce authentication.
- User: User for the Salesforce account.
- Reply Events Policy: Indicates when event responses should be sent back from this target.
- spec.auth fields are required.
- Event options include the
payloadPolicywhich specifies if responses should be sent. Possible values arealways,errorandnever. Default value isalways.
The Salesforce target accepts the event type io.triggermesh.salesforce.apicall and returns io.triggermesh.salesforce.apicall.response
The payload contains a JSON structure with elements to execute the API request:
action: is the HTTP verb to use.resource: is the object family to use.object: is the object type to operate on.record: is the object instance.query: parametrized key/values for the API request.payload: body contents for the request.
All those parameters but payload are put together sequentially to build the request:
Please, refer to the Salesforce API on how to fill in values to execute requests.
When a request is sent using this Target, a response might be produced containing the reply from Salesforce or an error. Depending on if there are other Targets listening to these new events you might want to configure the reply behavior from this component. There are three possible values for the reply events policy:
Never: No response will be produced.Error: Only errors will be returned from the Target.Always: External responses or errors will be produced.
When a response is produced from a Target, the extended attribute category is added which will contain one of two values:
Success: For when the request succeeds.Error: For when an error occurs.
Returned errors structure is defined in this schema.
You can test the Target by sending it an event using curl.
The Salesforce target will create an account when receiving this event.
curl -v -X POST http://localhost:8080  \
    -H "content-type: application/json"  \
    -H "ce-specversion: 1.0"  \
    -H "ce-source: curl-pablo"  \
    -H "ce-type: io.triggermesh.salesforce.apicall"  \
    -H "ce-id: 123-abc" \
    -H "ce-statefulid: my-stateful-12345" \
    -H "ce-somethingelse: hello-world" \
    -H "statefulid: hello-world" \
    -d '{
          "action": "POST",
          "resource": "sobjects",
          "object": "account",
          "payload": {"Name": "test"}
        }'
An account can be deleted.
curl -v -X POST http://localhost:8080  \
  -H "content-type: application/json"  \
  -H "ce-specversion: 1.0"  \
  -H "ce-source: curl-pablo"  \
  -H "ce-type: my-curl-type"  \
  -H "ce-id: 123-abc" \
  -H "ce-statefulid: my-stateful-12345" \
  -H "ce-somethingelse: hello-world" \
  -H "statefulid: hello-world" \
  -d '{
        "action": "DELETE",
        "resource": "sobjects",
        "object": "account",
        "record": "0014x000005Y9SNAA0"
      }'
Specific fields of an account can be retrieved by using the query parameter.
curl -v -X POST http://localhost:8080  \
  -H "content-type: application/json"  \
  -H "ce-specversion: 1.0"  \
  -H "ce-source: curl-pablo"  \
  -H "ce-type: my-curl-type"  \
  -H "ce-id: 123-abc" \
  -H "ce-statefulid: my-stateful-12345" \
  -H "ce-somethingelse: hello-world" \
  -H "statefulid: hello-world" \
  -d '{
        "action": "GET",
        "resource": "sobjects",
        "object": "account",
        "record": "0014x000005VB1lAAG",
        "query": {"fields": "AccountNumber,BillingPostalCode"}
      }'
Salesforce uses PATCH to update records
curl -v -X POST http://localhost:8080  \
  -H "content-type: application/json"  \
  -H "ce-specversion: 1.0"  \
  -H "ce-source: curl-pablo"  \
  -H "ce-type: my-curl-type"  \
  -H "ce-id: 123-abc" \
  -H "ce-statefulid: my-stateful-12345" \
  -H "ce-somethingelse: hello-world" \
  -H "statefulid: hello-world" \
  -d '{
        "action": "PATCH",
        "resource": "sobjects",
        "object": "account",
        "record": "0014x000005Y9SNAA0",
        "payload": {"Name": "test2", "BillingCity" : "San Francisco"}
      }'
See the Kubernetes object reference for more details.
Prerequisite(s)
- Salesforce account
- Certificate key secret
Salesforce Account
Salesforce Target uses OAuth JWT credentials for service authentication.
First, you will need to generate an X509 certificate for signing and verifying requests. We will be using OpenSSL, but any other certificate generation tool will work.
-
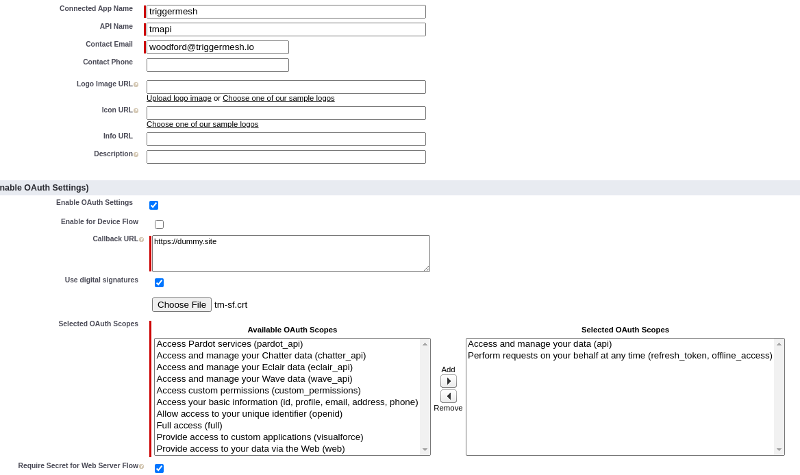
On the Salesforce site select Setup > Apps > App Manager, click on New Connected App.
- Fill in mandatory fields, then click Enable OAuth Settings.
- A callback URL is mandatory but can be filled with any HTTPS data.
- Enable
Use digital signaturesand upload the public cert (tm-sf.crtin the example above). - Add Scopes for
api,refresh_token, andoffline_access. - Click
Save.
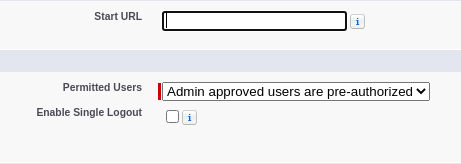
- Select the connected app you just created from the list and then click
Manage. - Click
Edit policies. - Set
Permitted userstoAdmin approved users are pre-authorized. - Click
Save.
- Select the connected app from the list and then click
Manage. - Click
Manage Profiles. - Add permissions on the data this user will have access to.
- Click
Save.
-
Retrieve OAuth data to configure TriggerMesh Target.
- Select the connected app from the list and then click
View. - Copy the
Consumer Key. - Reveal and copy the
Consumer Secret.
- Select the connected app from the list and then click
Certificate Key Secret
The TriggerMesh Salesforce integration needs a certificate key secret to sign requests for the Salesforce API.